Cost centres and budgets in TallyBook: track spending by branch, project or department
A Profit & Loss account tells you whether the whole business made money. It does not tell you that Shop A is profitable while Shop B is losing, or that the marketing department has already spent its yearly budget by October. Cost centres and budgets answer those questions, and TallyBook supports both in the familiar TallyPrime way.
Step 1: enable cost centres
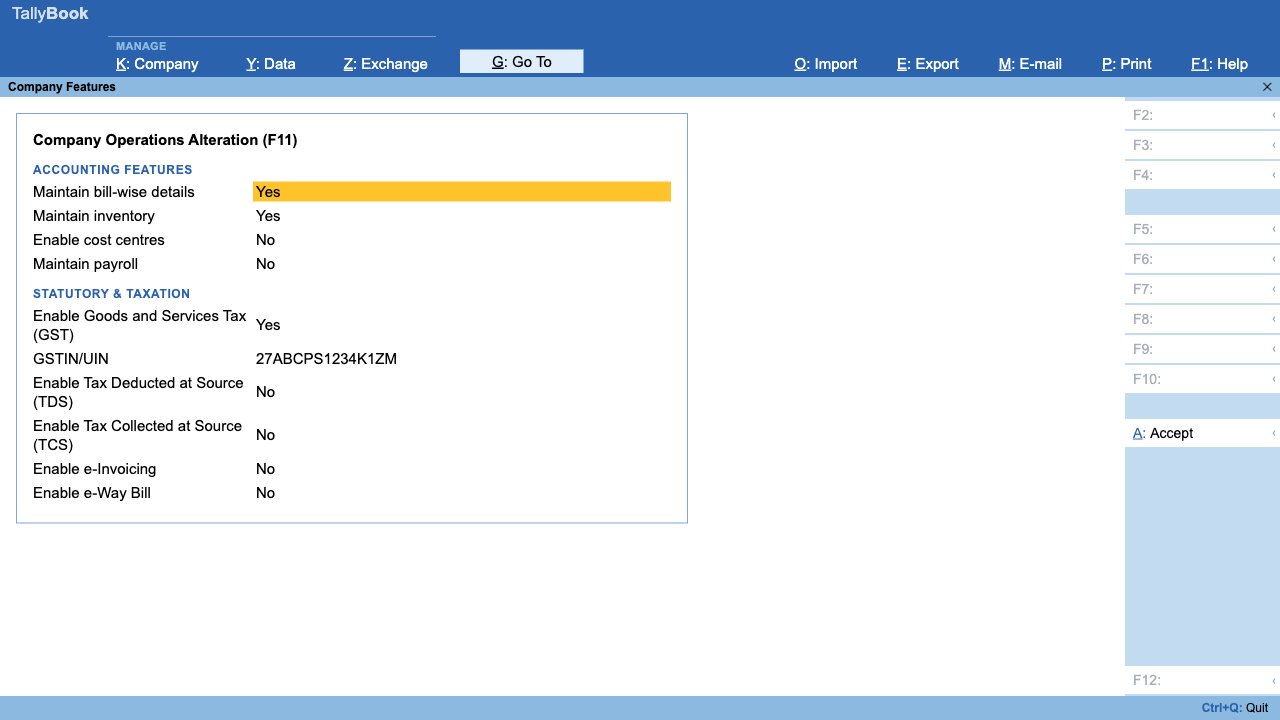
- Press F11 to open Company Features and set Enable cost centres to Yes. Press Ctrl+A.
- Go to Gateway of Tally › Create. A new section, Cost Centre Masters, now lists Cost Category and Cost Centre.
- Optionally create cost categories, such as “Branches” and “Projects”. Every company already has one called Primary Cost Category, which is enough for most small businesses.
- Create a cost centre for each unit, for example “Shop A – Andheri” and “Shop B – Thane”. Use Under to nest centres, such as departments inside a branch.
- Open each income or expense ledger you want to track (Gateway › Alter › Ledger) and set Cost centres are applicable to Yes.
Cost category options
| Field | Meaning |
|---|---|
| Allocate Revenue Items | Income and expense amounts can be split across centres in this category. Yes by default. |
| Allocate Non-revenue items | Allows allocation of balance sheet items. No by default. |
When a company has more than one category, the Cost Centre form asks which category each centre belongs to.
Step 2: allocate during voucher entry
Enter vouchers as usual. When you press Ctrl+A to accept a voucher that contains a ledger marked “Cost centres are applicable”, TallyBook opens the Cost Centre Allocations screen for that ledger. It shows the ledger name and the amount to allocate, for example “Up to: ₹ 30,000.00 Dr”.
- Pick a cost centre; TallyBook fills in the unallocated amount, which you can change.
- Add more lines until Unallocated at the bottom reaches zero.
- If you have several categories, add a Cost Category column and split the amount within each category.
- If the lines do not add up, you see “Cost Break-up Total does not match for ledger” and the voucher is not saved.
Step 3: read the cost centre reports
Gateway › Display More Reports › Cost Centres offers three reports:
| Report | What it shows |
|---|---|
| Cost Centre Summary | Every centre with its debits, credits and closing balance for the period. Press Enter to see a centre month by month, then the vouchers behind it. |
| Cost Category Summary | The same, one category at a time |
| Cost Centre Breakup | Groups and ledgers with a column for each chosen centre. Press Alt+C to add another centre as a new column. |
These reports support F12 (for example, hide centres with no transactions), Ctrl+F to filter and Alt+F2 to change the period.
Step 4: create a budget
- Go to Gateway of Tally › Create › Budget. The Budgets section is always available; you do not need cost centres for it.
- Enter a Name such as “FY 2026-27”, keep Under as Primary, and enter the Period of Budget from and to dates.
- Under Set / Alter Budgets of, choose Groups, Ledgers, Cost Centres, or any mix.
- For each, fill the grid: account name, Type of Budget (On Nett Transactions or On Closing Balance) and amount. For cost centres, enter expected Expenses and Income.
- Accept each grid in turn to save the budget.
On Nett Transactions compares the movement during the period, which suits expenses and sales. On Closing Balance compares the balance at the end, which suits items like a loan or debtors.
Step 5: compare with Budget Variance
Open Display More Reports › Statements of Accounts › Budget Variance and pick the budget. You see Budget, Actuals and Variance for each group. Press Enter on a group to drill in, F5 to switch between group-wise and ledger-wise, and F12 to show or hide rows with no budget or actuals.
What is not there yet
- Cost Centre Class (automatic allocation by fixed percentages) is not built, so you split each voucher yourself.
- Budget controls that warn when you exceed a budget are not built.
Related reading: choosing groups for income and expense ledgers, report shortcuts and reading your P&L.
Frequently asked questions
What is the difference between a cost centre and a cost category?
A cost centre is one unit you track, such as Shop A or Project X. A cost category is a way of grouping centres, such as Branches or Projects. A single amount can be split across centres in each category separately.
Can I use cost centres for balance sheet items like assets?
Each cost category has two switches: Allocate Revenue Items (income and expenses) and Allocate Non-revenue items. In this preview the allocation prompt appears only for income and expense ledgers marked Cost centres are applicable.
I forgot to allocate a voucher. Can I add it later?
Yes. Since version 0.2.0 the allocation screen appears again when you alter a voucher, with any earlier allocations filled in. Alter the voucher, accept it, and enter the cost centre split when asked.
Do budgets stop me from overspending?
No. Budgets in TallyBook are for comparison only. Budget controls that warn or block entries are not built yet.
TallyBook is not affiliated with Tally Solutions Pvt. Ltd. TallyPrime is a trademark of its owner.